How I built a SaaS with Next.js in a week
I built Cusdis in April 2021, an open-source, light-weight, privacy-friendly alternative to Disqus. I built it in just a week and got a large amount discussions on HackerNews. It also was shown on HackerNews front page.
In this post, I want to share how did I build Cusdis and what I've learnt in this project. Especially some experiences of efficiently building application with Next.js.
How did I come up with this idea
I used Disqus in my personal blog. It works well but sometimes spends too much time to load the whole comment thread. One day I saw this article which discuss about the privacy issue and slow loading speed issue of Disqus. It makes me think of building a Disqus alternative that solves theses issues. And named it as the reverse of Disqus -- Cusdis.
System design
I think a most minimalist comment system contains at least three parts:
- A database, to store threads info, comments.
- A frontend widget that can be embedded to website.
- A dashboard to manage (approve, reply, delete) comments.
- A server that provides API to the widget and as the backend of the dashboard.
Database
In my opinion (I'm not a database expert), SQLite is good enough to implement a comment system. But because I want to have a hosted service, SQLite is not fit for serverless environment and concurrent usecase, while PostgreSQL is suitable in this case but it's over complicate for self-host users. In the end I decided:
- For the self host user, SQLite is by default. They don't have to set up a PostgreSQL instance to use Cusdis
- Giving an option to use PostgreSQL (for the self host user and our hosted service)
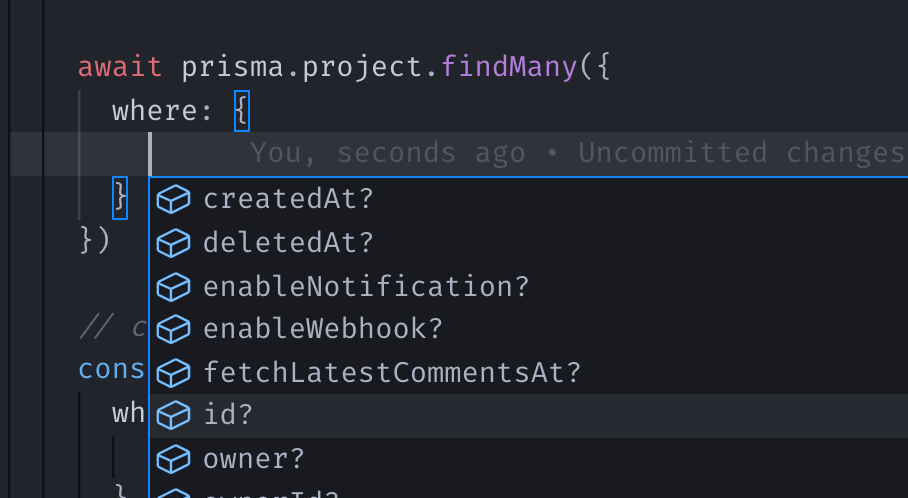
To CURD database in Node.js, I choose Prisma. It's because Prisma uses an elegant schema syntax to describe data model, for example:
model User {
  id String @id @default(uuid())
  username String
  password String
  bio String?

  posts Post[]

  createdAt DateTime @default(now())
}

model Post {
  id String
  title String
  userId String
  user User

  createdAt DateTime @default(now())
}
Even if you haven't heard of Prisma, you can probably understand how the database is like through this schema file.
Prisma will generate a js client to query database for you when you run npx prisma generate. This js client is typed so that you can get intellisense.
Use Next.js for dashboard and as an API server
Next.js is a very good framework for building fullstack application. You don't need to do a frontend setup and then do a backend setup. Instead, Next.js takes care of both.
Use Prisma in Next.js
There is no difference between using Prisma in Next.js and Node.js. The only thing you need to take care is that in development environment, Next.js will clear cache when hot reload. New PrismaClient would be initialized many time. It will cause a warnning:
warn(prisma-client) Already 10 Prisma Clients are actively running.
To deal with it, I create a singleton helper to make a singleton instance:
export const singleton = <T>(id: string, fn: () => T) => {
  if (process.env.NODE_ENV === 'production') {
    return fn()
  } else {
    if (!global[id]) {
      global[id] = fn()
    }
    return global[id] as T
  }
}
This helper caches the instance on global, which won't be clear in Next.js. I use this helper to create a singleton prisma, which can be imported from everywhere without being worried about duplicated db connections.
export const prisma = singleton('prisma', () => {
  return new PrismaClient()
})
Using middlware in API routes
I use next-connect to use connect-like middlewares. A traditional API route handler in Next.js is like:
import { NextApiRequest, NextApiResponse } from "next";

export default async function handler(req: NextApiRequest, res: NextApiResponse) {
  if (req.method === 'GET') {
    // ...
  } else if (req.method === 'POST') {
    // ...
  }
}
With next-connect, it becomes:
import nc from "next-connect"

export default nc()
  .use(someMiddleware())
  .get(async (req, res) => {
    // ...
  })
  .post(async (req, res) => {
    // ...
  })
So I can write an auth middleware that inject a user object in the req:
function auth(req, res, next) {
  const user = await getUser(req.cookies.token)
  req.user = user
  next()
}

export default nc()
  .use(auth)
  .post(async (req, res) => {
    console.log(req.user)
    // ...
  })
Handling API route error
I used to think handling error in Next.js is hard. But next-connect is a game changer. I can handle all errors in api route handler in a single catch-all error handler onError like:
// src/pages/api/foo.ts

const handler = nc({
  onError(err, req, res, next) {
    console.error(err)
    next()
  }
});

export handler
  .get(async (req, res) => {
    throw new Error('foo')
  })
It makes error handling more easy because I can apply the Exception Filters pattern:
Throw unified error object anywhere and deal with it in a single place.
I choose @hapi/boom as the unified HTTP exception object. I can throw Boom exception in api routes and handle it on onError:
import * as Boom from '@hapi/boom'

export const apiHandler = () => nc({
  onError(err, req, res, next) {
    if (Boom.isBoom(e)) {
      res.status(e.output.payload.statusCode);
      res.json({
        error: e.output.payload.error,
        message: e.output.payload.message,
      });
    } else {
      res.status(500);
      res.json({
        message: "Unexpected error",
      });
      console.error(e);
      // unexcepted error, catch with Sentry, etc.
    }
  }
});

apiHandler()
  .get(async (req, res) => {
    const post = await getPost(req.query.postId)
    if (!post) {
      throw Boom.notFound(`Post not found`)
    }
  })
I write a
apiHandlermethod that return anext-connectinstance.
In the above example, I throw a Boom.notFound exception in the api route handler, this exception will be caught in onError, and set the corresponding http response status code and message.
Setup authentication in a minute
In hosted service, I don't want to implement my own user system because it can be complicated. I prefer using third-party login through OAuth.
next-auth is a authentication solution for Next.js. I follow the Prisma Adapter guide and integrate GitHub providers just in a minute! All I need to do is create a GitHub OAuth application and set up the next-auth provider in src/pages/api/[...nextauth].ts.
In api routes, I can simply call getSession() to get the current user. Remember we can use middleware in api route with next-connect? This is how do I secure the api route with a middleware:
// middleware
import { getSession }  from 'next-auth/client'
import * as Boom from '@hapi/boom'

export async function authGuard(req, res, next) {
  const user = await getSession({ req })

  if (!user) {
    throw Boom.forbidden('Please sign in first')
  }

  req.user = user

  next()
}
Then, I can use this authGuard middleware in any api routes that need to be secured:
// src/pages/api/foo.ts

apiHandler()
  .use(authGuard)
  .get(async (req, res) => {
    console.log(req.user)
    res.json({})
  })
Secure frontend page
If the whole page is not visible without signed in, I will check the session in getServerSideProps. If session is null, return a redirect to sign in page:
import { getSession } from 'next-auth/client'

export default PageOne() {
  return (
    <div>
      Not visible
    </div>
  )
}

export const getServerSideProps = (ctx) => {
  const session = await getSession({ req: ctx.req })

  if (!session) {
    return {
      redirect: {
        destination: '/api/auth/signin',
        permanent: false,
      }
    }
  }

  return {}
}
Comment widget
One of the main goal of Cusdis is being light-weight. I set a package size "budget" for the widget, that the sdk embedded in user's website and the resouces the sdk loads must be less than 10kb.
Svetle is the best choice in this case. It doesn't come with a runtime and compiles the component into vanilla JavaScript.
To my suprise, the final full-feature SDK was only 5kb (gzipped).
— Randy (@randyloop) April 28, 2021
The widget source code
In the first SDK version, the SDK will append the widget element to the user's website. It works well at first. But the problem is that the stylesheet of the user's website will affect the style in the widget component. Also, we have to prefix the class name when styling the element, to prevent our style won't affect the user's website.
The best practice would be put the widget component into an iframe. Everything works well except one question:
How to set iframe's height automatically according to the content height?
The iframe's height is fixed when it was created, no matter how the document in iframe would change. In order to make its' height automatically set to the document height, I use MutationObservable in the iframe to observe any document changes, when a change happens, it postMessage to parent window with the new offsetHeight, then the parent window change the iframe's height:
// in iframe

function requestResize() {
  window.parent.postMessage({
    event: 'resize',
    offsetHeight: document.documentElement.offsetHeight
  })
}

const resizeObserve = new MutationObserver(() => {
  requestResize()
})

resizeObserve.observe(target, {
  childList: true,
  subtree: true
})
// in main window

window.addEventListener('message', e => {
  if (e.data.event === 'resize') {
    iframe.style.height = `${e.data.offsetHeight}px`
  }
})
I'm not sure this is the best implementation. If you have better idea, please leave a comment.
Dealing with timezone
Comment created date would be saved as current UTC time in database when the comment is created. Users around the world would see this time in the widget the same, but not as their local time.
For example, when a user from China (UTC+8) see 2021-04-28 10:00 (in UTC), he thought the comment was created at Beijing time 2021-04-28 10:00 but is is not true. It was created at 2021-04-28 18:00 in Beijing time.
It means that when we display the time, we need to transform it by user's UTC offset first.
Fortunately, there is an API getTimezoneOffset() in browser, to get the UTC offset value. I send this value through HTTP request header:
import axios from 'axios'

export const apiClient = axios.create({
  headers: {
    'x-timezone-offset': -new Date().getTimezoneOffset()
  }
});
Then on the server side, we use dayjs to handle this offset:
const timezoneOffset = req.headers['x-timezone-offset']
const parsedCreatedAt = dayjs.utc(comment.createdAt).utcOffset(timezoneOffset).format('YYYY-MM-DD HH:mm')
Use Vite to bundle the SDK
The SDK should be bundle in a single JS file. I choose Vite because it's fast, and it has a built in PostCSS support. In other words, I don't need to care about the bundler, the only plugin I use is rollup-plugin-svelte for compiling Svelte component:
// vite.config.js

module.exports = {
  build: {
    lib: {
      entry: path.resolve(__dirname, '..', 'widget', 'sdk.js'),
      name: 'cusdis',
    },
    outDir: path.resolve(__dirname, '..', 'widget', 'dist'),
  },
  plugins: [
    require('rollup-plugin-svelte')({
      emitCss: false,
    }),
  ],
}
Wrapping up
Cusdis spent me one week to release the first version. Now there are around 50 active websites using Cusdis as their comment system. More than 10 people sponsor this project. All of these tools combine together makes me build a full-stack SaaS project so fast:
- next-auth to integrate third-party login in a minute
- next-connect to add a middleware layer in Next.js and comes with a better error handling solution
- prisma to generate typed ORM sdk
- chakra-ui to write usable and beautiful UI
- react-query to handle HTTP request
I also make a boilerplate with these awesome tools so that you can bootstrap your next SaaS project just in a minute!